Encoding a message into an Image
I had a lot of fun doing this one. Since I’m working through making some ciphers in python, I decided to dabble in some super basic steganography. I had the idea to use the ascii decimal values of a message, to generate RBG pixels and output a square image based off the results. I’m sure someone has already done this, but I wanted to work through the process on my own without referring to anyone’s code or logic.
Here’s how I did it!
Step 1: Making a “Pixel”
So during undergrad, we worked exclusively with C/C++ at my university. I love python, but I miss things from C++. I wanted to make a Pixel object so I could assign R(ed)-G(reen)-B(lue) values within it. In C++ I’d make a class or a struct (in this case going with the latter). Luckily, Python 3.7 introduced data classes… so I’m going to use it!
@dataclass
class Pixl:
    r: int
    g: int
    b: int
Once I had this object, I iterated through a message and got the ASCII decimal values for each character in the message and then appened each Pixel object to a list. I used ord() which just returns an integer value that corresponds to the Unicode character passed into it.
asciiz = []
message = "Can I generate a pixel image based on the ascii decimal values of each character?"

for c in message:
    p = Pixl(ord(c), ord(c), ord(c))
    asciiz.append(p)
For now, I’m just gonna assign the same integer to each RGB value. In the future, I want to add in some randomness to the pixel colors so that it’s not just a grayscale image.
Step 2: Generate a container for the “pixels”
Now that we have a list of “Pixels”, we need to decide how we’re going to generate an image with them. For simplicity’s sake, we’re just gonna do a square. So I take the Square Root of the length of the message, and then add 1. Basically my thought process was that I wanted the image to be symmetrical, and I wanted to make sure I’d have enough space for the entire message but also add some padding so the message length is not easily predictable.
In our message above, the character count is 81, so we’d only need a 9x9 square. By adding 1 to Sqrt(81), we can get some extra rows and columns to pad the image out. Yeah, yeah…security through obfuscation is a garbage philosophy but this isn’t RSA level encryption here! Anyways…
sqr = round(math.sqrt(len(message)))
sqr += 1
Step 3: Fill the container
Okay, so our pixel vessel is built. Let’s fill ’er up. This is a super simple process of iterating through each column index, row by row. Once we run out of characters, e.g. iteration_count == length of the message, we start filling the square with junk pixels.
I wanted to make sure the random junk pixel RGB values blended in to the rest of the message encoding. So I limit the decimal values to be between 32 and 125. Why those numbers? Simple, in the English alphabet ascii 32 is a space (the first ‘character’) and 125 is a |. Everything before and after those values, wouldn’t be something we’d find in a normal message. Doing this makes it so the junk pixel RGB values are similar to the message passed in, and they blend in with the rest of the image.
for j in range(0, sqr):
    for k in range(0, sqr):
        if i == len(asciiz):
            randrgb = random.randint(32, 125)
            img.putpixel((k, j), (randrgb, randrgb, randrgb))
        else:
            img.putpixel((k, j), (asciiz[i].r, asciiz[i].g, asciiz[i].b))
            i += 1
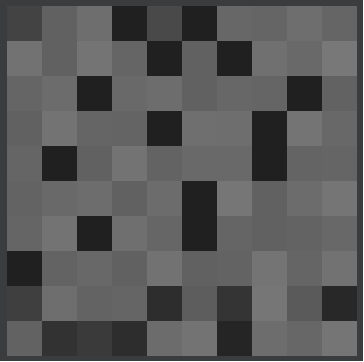
This is an example of an image that is output by this script:
![]()
Small, but when we zoom in:

Decoding
I didn’t write a method to decode yet, but it’s as simple as getting the dimensions of the image and then iterating columns and rows to grab the pixel color. Then we just use chr() (instead of ord()) to convert the decimal RGB value back to it’s corresponding character.
I’ll probably do that at some point when I have more time.
Full source code can be found in this repo.